Add the Verarca App to Business Central
Step 1: Log in to Business Central
Step 2: Click on the search button in the top right corner of the page
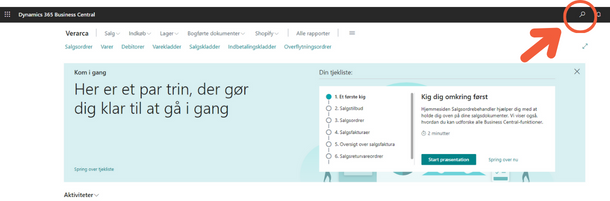
Step 3: Type “aad” in the search field that appears. Then click “Microsoft Entra Applications”
.png)
Step 4: In the “Microsoft Entra Applications” window, click the
“New” button.
-png.png)
Step 5: In the “Microsoft Entra Application” card, enter:
- Client ID – paste the Verarca Azure App ID: {fcc18624-8bc8-4ce5-b874-cbc111408330}
- Description (Verarca)
.png)
Step 6: Expand “Status” and choose “Enabled”
.png)
Step 7: Select “Yes” in the pop-up
-png.png)
Step 8: Under “User Permission Set” click in the
top left field.
.png)
Step 9: Click the three dots that appear to the right of the field.
.png)
Step 10: In the “Permission Set Lookup” window, click the
search button.
-png.png)
Step 11: Type “Bus premium” in the search field and click the permission “D365 BUS PREMIUM”.
-png.png)
Step 12: Repeat the same process and add the permission “SUPER (DATA)”
Step 13: Finally, your card should look like this:
-png.png)
Step 14: You’re done, you can return to the main page of
Business Central.

